

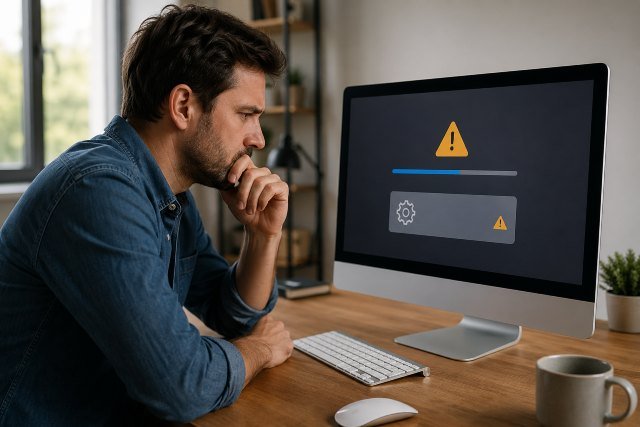
Seeing the message “Macos Installation Couldn’t Be Completed” can feel stressful, especially when your Mac is stuck during an update, restart loop, or recovery installation. The good news is that this error does not always mean your Mac is damaged. In many cases, it happens because of low storage, a weak internet connection, a corrupted installer, disk errors, date and time issues, or a problem with macOS Recovery.
- What Does “Macos Installation Couldn’t Be Completed” Mean?
- Common Causes of Macos Installation Couldn’t Be Completed
- Quick Answer: How to Fix Macos Installation Couldn’t Be Completed
- First, Restart Your Mac Properly
- Check Storage Space Before Trying Again
- Check Your Internet Connection
- Disconnect External Devices
- Start Your Mac in macOS Recovery
- Repair Startup Disk With Disk Utility First Aid
- Delete and Re-download the macOS Installer
- Use Safe Mode Before Installing Again
- Check Date and Time Settings
- Reinstall macOS Without Erasing Data
- Restore From Time Machine Backup
- Erase and Reinstall macOS as a Last Resort
- What If You See Error -1008F?
- What If You See a Globe With an Exclamation Mark?
- When the Internal Disk Does Not Appear
- Real-World Example
- Prevention Tips for Future macOS Installations
- Frequently Asked Questions
- Why does my Mac say macOS installation couldn’t be completed?
- Will I lose my files if macOS installation failed?
- Can I reinstall macOS without deleting everything?
- What should I do if Disk Utility finds errors?
- Should I erase my Mac to fix the installation?
- Conclusion
This guide explains the most common reasons behind the Macos Installation Couldn’t Be Completed error and gives you practical solutions you can try step by step. The goal is to help you fix the issue without losing data whenever possible.
Apple’s own guidance for macOS installation problems starts with checking storage, checking the internet connection, installing from macOS Recovery, repairing the startup disk, and only then considering more advanced options like firmware restore or erasing the Mac.
What Does “Macos Installation Couldn’t Be Completed” Mean?
The message usually means macOS started the installation process but failed before it could finish. Your Mac may restart again and again, show an installer screen, boot into Recovery, or display a message saying the installation could not continue.
This can happen during a normal macOS update, a clean installation, a reinstall from Recovery, or when upgrading from an older macOS version. Sometimes the issue is simple, such as not enough free space. Other times, it may involve file system errors, incompatible software, or a damaged internal storage device.
A failed macOS installation does not always delete your files. However, if your Mac keeps looping or asks you to erase the disk, you should stop and think carefully before clicking anything destructive.
Common Causes of Macos Installation Couldn’t Be Completed
The first cause is low storage space. macOS needs enough free space to download, unpack, verify, and install system files. If your Mac has very little free space, the installer may start but fail midway.
Another common cause is an unstable internet connection. This is especially important when installing macOS from Recovery, because your Mac may need to download installation files from Apple’s servers. Apple specifically recommends checking your internet connection when macOS update or installation errors appear.
A corrupted or outdated installer can also cause trouble. If you downloaded a macOS installer earlier and it now says it is damaged or cannot be verified, Apple recommends deleting that installer and downloading a fresh copy after repairing the disk.
Disk errors are another major reason. If your startup disk has file system problems, the installer may not be able to write the required files correctly. Apple recommends using Disk Utility from macOS Recovery to repair the startup disk when installation errors continue.
Quick Answer: How to Fix Macos Installation Couldn’t Be Completed
To fix Macos Installation Couldn’t Be Completed, restart your Mac, check your internet connection, make sure enough storage is available, disconnect unnecessary accessories, start in macOS Recovery, repair the startup disk with Disk Utility First Aid, and then reinstall macOS. If the installer is damaged, delete it and download a fresh copy from Apple.
If those steps fail, you may need to back up your data, erase the startup disk, and reinstall macOS. In rare cases, Macs with Apple silicon or the Apple T2 Security Chip may need firmware revive or restore through another Mac. Apple lists revive or restore as an advanced step for persistent macOS installation issues.
First, Restart Your Mac Properly
Start with the simplest fix. Hold the power button until your Mac shuts down. Wait a few seconds, then turn it back on. Sometimes the installer fails because of a temporary process error, and a clean restart can let macOS continue normally.
If your Mac returns to the same installer screen, look for a menu bar option such as Startup Disk. Choose your normal Macintosh HD if it appears, then restart. This may boot your Mac back into the previous macOS version instead of the failed installer.
If the Mac keeps returning to the same error, do not keep restarting endlessly. Move to Recovery and repair steps instead.
Check Storage Space Before Trying Again
Low disk space is one of the most common reasons macOS installation fails. If you can still boot into your Mac, open System Settings > General > Storage and check how much free space is available.
As a practical rule, try to keep far more free space than the installer minimum. A macOS upgrade may require extra room for temporary files, snapshots, logs, and system migration. If your Mac is almost full, remove large unused files, old downloads, duplicate videos, and unnecessary apps.
You can also move large files to an external drive or cloud storage before trying the installation again. Empty the Trash afterward, because deleted files still use space until Trash is cleared.
Internal link suggestion: link to your guide on how to free up storage on Mac.
Check Your Internet Connection
A weak or interrupted connection can cause the Macos Installation Couldn’t Be Completed error, especially during Recovery installation. Use a stable Wi-Fi network or Ethernet if your Mac supports it through an adapter.
Avoid public Wi-Fi networks that require browser login pages. macOS Recovery may not work well with captive portals found in hotels, schools, cafés, and offices.
If possible, restart your router, move closer to the Wi-Fi source, and try again. Apple includes internet connection checks as one of the first recommended steps for macOS update and installation errors.
Disconnect External Devices
External drives, USB hubs, printers, audio interfaces, SD cards, and adapters can sometimes interfere with installation. Shut down your Mac and disconnect everything except power, keyboard, mouse, and internet adapter if needed.
Then restart and try the installation again. This is a simple step, but it can prevent the installer from getting confused by external startup disks, damaged accessories, or incompatible drivers.
If the installation works after disconnecting devices, reconnect them one by one after macOS is fully installed.
Start Your Mac in macOS Recovery
If your Mac cannot boot normally, use macOS Recovery. Apple describes macOS Recovery as the built-in recovery system that lets you reinstall macOS, repair or erase the startup disk, restore from Time Machine, and use other utilities.
For a Mac with Apple silicon, shut down the Mac, then press and hold the power button until startup options appear. Choose Options, then continue into Recovery.
For an Intel-based Mac, restart and immediately hold Command + R to reinstall the current macOS version. Apple also notes that Option + Command + R can install the latest macOS compatible with your Mac, while Option + Shift + Command + R can reinstall the original macOS version or the closest available version.
Once you enter Recovery, do not erase the disk immediately. First try Disk Utility repair.
Repair Startup Disk With Disk Utility First Aid
Disk Utility First Aid can check and repair file system problems that may stop macOS from installing. In macOS Recovery, choose Disk Utility, select your startup disk or volume, and run First Aid.
Apple says that when repairing a Mac startup disk or a Mac that does not start all the way, you should start from macOS Recovery and open Disk Utility from the utilities window.
Apple’s Disk Utility guide also explains that to properly check and repair a disk, you should run First Aid on each volume and container in order, then run it on the storage device itself. If Disk Utility reports that the disk is about to fail, Apple recommends backing up your data and replacing the disk because Disk Utility cannot repair physical failure.
After First Aid finishes, restart your Mac and try installing macOS again.
Delete and Re-download the macOS Installer
If your Mac says the installer is damaged, cannot be verified, or was corrupted during download, delete the installer and download it again.
This is common when an old installer has expired certificates, incomplete files, or was interrupted during download. Apple recommends deleting a damaged or unverifiable installer and downloading the installer from Apple again after repairing the disk.
If you can boot into macOS, check the Applications folder for an app named something like Install macOS [version name]. Move it to Trash, empty Trash, and download a fresh copy.
Use Safe Mode Before Installing Again
Safe Mode can help when third-party login items, extensions, or background tools interfere with macOS installation. It also performs certain system checks during startup.
On Apple silicon Macs, shut down, press and hold the power button until startup options appear, select your startup disk, hold Shift, and choose Continue in Safe Mode.
On Intel Macs, restart and immediately hold Shift until the login window appears. Once in Safe Mode, try removing unnecessary apps, freeing storage, and running the installer again.
This is especially useful if the installation error started after installing system cleaners, old security tools, VPN drivers, disk utilities, or kernel extensions.
Check Date and Time Settings
Wrong date and time settings can cause installer verification problems. If your Mac can boot normally, go to System Settings > General > Date & Time and turn on automatic date and time.
If you are stuck in Recovery, you may need to use Terminal to check or correct the date, but this step should be handled carefully. Most modern Macs fix time automatically when connected to the internet, so try a stable connection first.
A wrong system clock can make certificates appear expired or invalid, which may lead to messages like “macOS could not be verified” or “installation cannot continue.”
Reinstall macOS Without Erasing Data
If disk repair works but the error remains, try reinstalling macOS from Recovery without erasing your disk. In Recovery, choose Reinstall macOS, follow the instructions, and select your normal startup disk.
Apple’s Recovery tools include the option to reinstall macOS, and the process is available on both Apple silicon and Intel-based Macs.
A standard reinstall usually keeps your files and apps, but you should still back up important data first if possible. Installation failures can become more complicated if the disk is already unstable.
Restore From Time Machine Backup
If you made a Time Machine backup before the failed installation, you may be able to restore your Mac to a working state. In macOS Recovery, choose Restore from Time Machine and select a backup made before the problem started.
This is often the best option if the update created a boot loop or broke a working setup. It can save time compared with manually troubleshooting every possible installer issue.
Before restoring, remember that newer files created after the backup date may be lost unless you separately saved them.
Internal link suggestion: link to your guide on how to restore Mac from Time Machine backup.
Erase and Reinstall macOS as a Last Resort
Erasing the Mac should not be your first step. It removes data from the selected disk, so make sure you have a backup before doing it.
If none of the previous solutions work, Apple lists erasing the Mac and resetting it to factory settings as a later step for unresolved installation problems.
For Apple silicon Macs, Apple says you need to start from macOS Recovery or another disk before erasing the startup disk with Disk Utility.
For Intel-based Macs, Apple’s erase guidance says to start from macOS Recovery, open Disk Utility, select the volume, and use the Erase button. It also notes that if the internal disk does not appear in Disk Utility or erase fails, the Mac may need service.
After erasing, return to Recovery and choose Reinstall macOS.
What If You See Error -1008F?
Some users see error -1008F when trying to start Recovery. Apple says that if your Mac starts up to error -1008F, you should try starting from macOS Recovery using Option + Command + R instead of other Recovery key combinations, or disable Activation Lock.
This error can feel confusing because it blocks the repair process before you even reach the installer. Using the correct Recovery shortcut can make a big difference.
What If You See a Globe With an Exclamation Mark?
A globe with a warning symbol means your Mac tried to start from Internet Recovery but could not connect successfully. Apple describes this as a sign that the Mac attempted Recovery over the internet but failed.
Try a different Wi-Fi network, use Ethernet if possible, restart the router, or move closer to the wireless access point. Avoid networks with login screens.
When the Internal Disk Does Not Appear
If Macintosh HD or the internal storage does not show in Disk Utility, shut down the Mac, unplug nonessential accessories, and try Recovery again. Apple says the built-in startup disk should appear in the Disk Utility sidebar and is usually named Macintosh HD unless renamed. If it still does not appear, or Disk Utility reports that erase failed, the Mac may need service.
This may point to a serious storage problem, especially on older Macs or devices that have been dropped, overheated, or exposed to liquid.
Real-World Example
Imagine a user tries to upgrade an older MacBook from a previous macOS version. The installer downloads successfully, the Mac restarts, and then the screen says “Macos Installation Couldn’t Be Completed.”
The user restarts several times, but the same message returns. Instead of erasing the Mac, they enter macOS Recovery, run Disk Utility First Aid, and discover minor file system errors. After repair, they restart, free up 30 GB of storage, delete the old installer, and download a fresh copy. The installation then completes normally.
This is why the best approach is not panic. Start with low-risk fixes first, then move to advanced options only when necessary.
Prevention Tips for Future macOS Installations
Before installing a major macOS update, back up your Mac with Time Machine. This gives you a safe return point if anything goes wrong.
Keep enough free storage available. A Mac that is always near full capacity is more likely to have update problems, slow performance, and app crashes.
Use a reliable internet connection and keep your Mac plugged into power during installation. Avoid closing the lid or forcing shutdown unless the Mac is completely frozen.
Also, avoid using unofficial macOS installers. Download macOS only through Apple’s supported methods or the App Store when available.
Frequently Asked Questions
Why does my Mac say macOS installation couldn’t be completed?
Your Mac may show this message because of low storage, disk errors, a damaged installer, weak internet connection, wrong date and time settings, or Recovery-related problems. Start with storage, internet, and Disk Utility First Aid before erasing anything.
Will I lose my files if macOS installation failed?
Not always. A failed installation does not automatically mean your files are gone. However, erasing the disk will remove data, so try repair and reinstall options first. Back up your data whenever possible.
Can I reinstall macOS without deleting everything?
Yes, in many cases you can reinstall macOS from Recovery without erasing the disk. This usually keeps your files and apps, but you should still back up important data before proceeding.
What should I do if Disk Utility finds errors?
Run First Aid on the relevant volumes, containers, and disk. Apple recommends using Disk Utility from Recovery when repairing a startup disk. If Disk Utility says the disk is failing, back up your data and consider service or replacement.
Should I erase my Mac to fix the installation?
Erase your Mac only as a last resort after trying safer fixes like restarting, checking storage, repairing the disk, deleting the damaged installer, and reinstalling from Recovery.
Conclusion
The Macos Installation Couldn’t Be Completed error can happen for many reasons, but most fixes follow a clear path. Start with simple steps: restart your Mac, check storage, confirm your internet connection, and disconnect external devices. Then use macOS Recovery, run Disk Utility First Aid, and reinstall macOS.
If the installer is damaged, delete it and download a fresh copy. If your startup disk has errors, repair it before trying again. If nothing works, back up your data and consider erasing and reinstalling macOS as a last resort.